
A water flosser can be one of the best additions to our oral hygiene routine. While brushing removes plaque from the surfaces of our teeth, a water flosser reaches areas that a toothbrush often misses. It uses a focused stream of water to flush out food particles, bacteria, and plaque from between teeth and along the gumline.
Yet many people encounter the same challenge when they bring a new device home: figuring out exactly how to set it up.
Fortunately, setting up a water flosser is much easier than it may seem. In just a few minutes, we can prepare the device for daily use and start enjoying a cleaner, fresher smile. This guide covers everything from unboxing and assembly to pressure adjustments, maintenance, and troubleshooting tips.
Why Proper Setup Is Important
Before turning on a new water flosser, it helps to understand why proper setup matters.
A correctly assembled and configured device provides:
- Better cleaning performance
- Consistent water pressure
- Reduced risk of leaks
- Improved comfort during use
- Longer device lifespan
Think of a water flosser like a high-performance tool. Even the best device cannot perform at its peak if it is not assembled and adjusted correctly.
What Is a Water Flosser?
A water flosser is an oral care device designed to clean areas between teeth and around the gums using a pressurized stream of water.
Unlike traditional string floss, which relies on physical contact to remove debris, a water flosser uses pulsating water to wash away:
- Food particles
- Plaque buildup
- Harmful bacteria
- Debris trapped around braces
- Residue near dental implants and crowns
For many users, it offers a more comfortable and convenient way to maintain oral health.
Getting Familiar with the Components
Before assembling the device, let’s identify the main parts commonly found in most water flossers.
Water Reservoir
The reservoir stores the water used during flossing sessions. Some models have large removable tanks, while portable versions include compact built-in reservoirs.
Handle
The handle is the part we hold while directing the water stream toward our teeth and gums.
Flosser Tip
The tip attaches to the handle and controls the direction of the water flow.
Pressure Control
Most water flossers allow users to adjust pressure levels for a more personalized cleaning experience.
Power Source
Depending on the model, power may come from a rechargeable battery or a direct electrical connection.
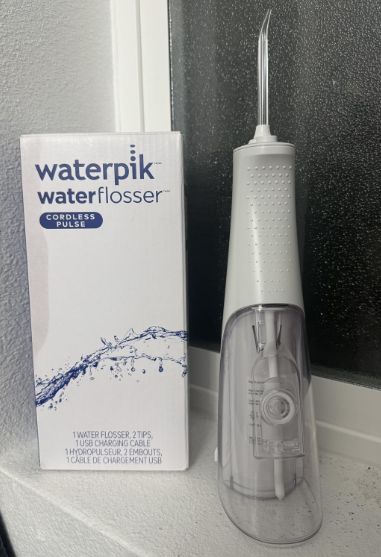
Unpack and Inspect the Device
The first step is simply opening the box and ensuring all components are present.
Most packages include:
- Main water flosser unit
- Water reservoir
- One or more flossing tips
- Charging cable or power adapter
- User guide
Carefully inspect every part for visible damage before proceeding with setup.
Clean the Reservoir Before First Use
Although the device is brand new, cleaning the reservoir before use is highly recommended.
How to Clean It
- Remove the tank from the unit.
- Rinse thoroughly with warm water.
- Wash gently if recommended by the manufacturer.
- Allow it to dry before reassembly.
This simple step helps eliminate dust and residues that may have accumulated during packaging and transportation.
Charge the Water Flosser Fully
If you have purchased a cordless model, charging the battery should be your next priority.
A full charge helps ensure:
- Stable water pressure
- Better battery performance
- Longer operating time
Many cordless units require several hours for the initial charge.
Charging Tips
- Use the original charger supplied with the device.
- Place the unit on a dry surface.
- Avoid charging near standing water.
- Wait until charging indicators show completion.
Starting with a fully charged battery provides the best first-use experience.
Choose the Appropriate Flosser Tip
Most modern water flossers include multiple tips designed for different needs.
Standard Jet Tip
Ideal for daily flossing and general use.
Orthodontic Tip
Designed specifically for individuals with braces.
Plaque-Seeker Tip
Useful around crowns, bridges, and dental implants.
Tongue Cleaner Tip
Helps remove bacteria that contribute to bad breath.
For first-time users, the standard tip is usually the best option.
Install the Tip Correctly
Once the desired tip has been selected, it must be attached securely.
How to Attach the Tip
- Align the tip with the handle opening.
- Insert it firmly.
- Push until you hear or feel a click.
- Test it by pulling gently.
A properly secured tip prevents leaks and ensures consistent water pressure during operation.
Fill the Reservoir with Water
With the tip installed, the next step is filling the tank.
Best Water Temperature
Lukewarm water is generally the most comfortable choice.
Many people find that extremely cold water can trigger tooth sensitivity, while hot water may damage internal components.
How Much Water Should Be Added?
Fill the reservoir to the recommended level indicated by the manufacturer.
Avoid overfilling, as this can cause spills during use.
Can Mouthwash Be Used in a Water Flosser?
This is one of the most common questions among new users.
The answer depends on the device.
Many manufacturers allow diluted mouthwash solutions, provided users clean the reservoir afterward.
Best Practices
- Mix mouthwash with water.
- Avoid highly concentrated solutions.
- Rinse the tank thoroughly after each use.
This helps prevent residue buildup inside the unit.
Adjust the Water Pressure
Water pressure settings can dramatically influence comfort and effectiveness.
Beginners should always start with the lowest setting.
Recommended Starting Pressure
- Low pressure for sensitive gums
- Medium pressure after gaining confidence
- Higher settings only if comfortable
Starting gently allows gums to adapt gradually.
How to Find the Right Setting
The ideal pressure should:
- Feel comfortable
- Remove debris effectively
- Avoid unnecessary discomfort
Remember, stronger isn’t always better.
Position Yourself Correctly
Before activating the device, lean slightly over the sink.
This simple step prevents water from splashing onto countertops and mirrors.
Proper Body Position
- Lean forward comfortably.
- Keep your lips partially closed.
- Allow water to flow into the sink.
This technique makes the process cleaner and more manageable.
Turn On the Device
With the tip already inside your mouth, turn on the water flosser.
Never activate the device before positioning the tip correctly.
How to Begin Flossing
- Place the tip near the gumline.
- Turn on the power.
- Move slowly from tooth to tooth.
- Pause briefly between teeth.
Patience leads to better cleaning results.
Using the Correct Flossing Technique
Proper technique matters just as much as proper setup.
Aim Along the Gumline
The gumline is where plaque frequently accumulates.
Direct the water stream along this area for maximum effectiveness.
Maintain a 90-Degree Angle
Position the tip so that the water stream reaches the gums directly.
This angle improves cleaning efficiency.
Move Methodically
Work around your mouth in a consistent pattern.
A systematic approach reduces the likelihood of missing areas.
Common Setup Mistakes to Avoid
Many beginners encounter similar problems.
Fortunately, most are easy to prevent.
Starting at Maximum Pressure
High pressure can be uncomfortable and overwhelming for first-time users.
Skipping the Initial Cleaning
Failing to clean the reservoir before first use may introduce unwanted contaminants.
Improper Tip Installation
A loose tip can reduce pressure and create leaks.
Using Hot Water
Hot water can damage components and cause discomfort.
Setting Up a Countertop Water Flosser
Countertop models offer powerful performance and larger water capacities.
Choose the Right Location
Place the unit:
- Near a sink
- Close to an electrical outlet
- On a stable surface
Keep Cords Safe
Always ensure power cords remain away from standing water.
Safety should never be overlooked.
Setting Up a Cordless Water Flosser
Cordless models are ideal for portability and travel.
Fully Charge Before Use
Many performance complaints stem from insufficient charging.
Prepare for Travel
Before packing:
- Empty the reservoir
- Remove the tip
- Store accessories separately
These precautions help protect the device.
Cleaning and Maintenance After Setup
Proper maintenance keeps a water flosser performing like new.
Clean the Reservoir Weekly
A simple mixture of water and vinegar can help remove mineral deposits.
Replace Tips Regularly
Most manufacturers recommend replacing tips every three to six months.
Allow Components to Dry
After use:
- Empty remaining water
- Leave the reservoir open
- Allow airflow around components
This minimizes bacterial growth.
Troubleshooting Common Problems
Even properly assembled devices occasionally experience issues.
The Device Won’t Turn On
Possible causes include:
- Low battery
- Faulty power connection
- Improper assembly
Weak Water Pressure
Check for:
- Clogged tips
- Low battery levels
- Insufficient water
Water Leaks
Inspect:
- Reservoir placement
- Seals and gaskets
- Tip connection points
Most leaks can be resolved quickly.
Tips for the Best Results
A water flosser delivers the greatest benefits when used consistently.
Use It Every Day
Daily use supports healthier gums and cleaner teeth.
Combine It with Brushing
Water flossing works best alongside regular brushing.
Be Consistent
Oral health improvements occur gradually. Consistency is the key to long-term success.
Who Should Use a Water Flosser?
Almost anyone can benefit from using a water flosser, but certain groups may find it especially helpful.
People with Braces
Water flossers can reach around wires and brackets more easily than traditional floss.
People with Dental Implants
They provide gentle cleaning around sensitive dental work.
People with Sensitive Gums
Lower pressure settings make flossing more comfortable.
People Who Struggle with Traditional Floss
A water flosser often encourages better daily flossing habits.
Conclusion
Learning how to set up a water flosser is a straightforward process that pays dividends for oral health. By cleaning the reservoir, charging the device, selecting the appropriate tip, filling the tank with lukewarm water, and choosing a comfortable pressure setting, we create the foundation for an effective flossing routine.
The setup itself takes only a few minutes, but the benefits can last for years. Cleaner teeth, healthier gums, fresher breath, and improved confidence all begin with a properly prepared device. Once everything is assembled and adjusted, the only thing left to do is make water flossing part of our daily routine.
Frequently Asked Questions
1. How long does it take to set up a water flosser?
Most water flossers can be assembled and prepared for use in less than ten minutes.
2. What type of water should be used?
Lukewarm water is generally the most comfortable and safest choice.
3. Can mouthwash be added to the reservoir?
Many devices allow diluted mouthwash, but users should follow manufacturer recommendations.
4. What pressure setting is best for beginners?
The lowest setting is usually recommended until gums become accustomed to the water stream.
5. How often should water flosser tips be replaced?
Most tips should be replaced every three to six months for optimal performance.