
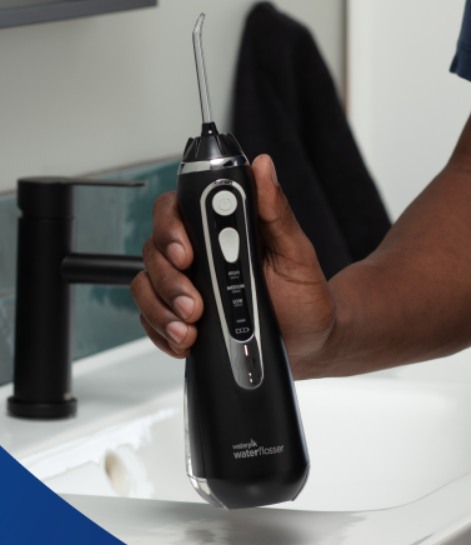
A cordless Waterpik water flosser is one of those gadgets that quietly transforms our oral hygiene routine. It blasts away food particles, helps reduce plaque, and reaches places traditional floss often misses. But here’s the catch: if we don’t clean the device itself, we’re essentially asking a tool designed for cleanliness to become a breeding ground for bacteria, mold, and mineral buildup.
Think about it. Every day, water flows through a small reservoir, tubing, and nozzle. Over time, minerals from tap water accumulate, moisture lingers, and residue forms. It’s a bit like owning a coffee maker and never cleaning it—eventually, performance drops and unpleasant surprises appear.
The good news? Cleaning a cordless Waterpik water flosser is remarkably simple. With a few minutes of regular maintenance, we can keep the device operating efficiently, extend its lifespan, and ensure every flossing session remains fresh and hygienic.
Why Cleaning Your Cordless Waterpik Matters
Many users focus entirely on cleaning their teeth while forgetting about the device doing the work.
A neglected water flosser can develop:
- Mineral deposits
- Bacterial growth
- Mold and mildew
- Reduced water pressure
- Unpleasant odors
- Clogged tips and pathways
Regular maintenance protects both the device and our oral health. After all, the last thing we want is contaminated water spraying into our mouths.
Understanding the Parts of a Cordless Waterpik
Before cleaning, it helps to know what we’re working with.
Water Reservoir
The tank holds water during use and is often the first place where buildup occurs.
Flosser Tip
The removable tip directs water between teeth and gums.
Handle Unit
This contains the motor, battery, and internal water channels.
Charging Components
These require special care because moisture and electricity don’t mix.
Understanding each component makes cleaning more effective and prevents accidental damage.
How Often Should You Clean a Cordless Waterpik?
Different parts require different cleaning schedules.
After Every Use
- Empty the reservoir
- Rinse the tank
- Wipe external surfaces
- Allow the device to air dry
Weekly
- Deep clean the reservoir
- Sanitize the flosser tip
- Inspect for buildup
Monthly
- Remove mineral deposits
- Flush internal components
- Check overall performance
Consistency is more important than intensity. A few minutes each week can prevent major maintenance issues later.
Supplies You’ll Need
Fortunately, specialized cleaning products aren’t necessary.
Gather the following:
- White vinegar
- Warm water
- Soft cloth
- Cotton swabs
- Mild dish soap
- Small cleaning brush
- Paper towels
These everyday household items are enough to keep most cordless Waterpik models in excellent condition.
How to Clean the Water Reservoir
The reservoir deserves the most attention because it’s constantly exposed to moisture.
Step 1: Empty Remaining Water
After flossing, pour out any leftover water immediately.
Stagnant water is an open invitation for bacterial growth.
Step 2: Remove the Reservoir
Most cordless Waterpik models allow easy removal of the tank.
Check your specific model instructions if necessary.
Step 3: Wash with Warm Soapy Water
Use mild dish soap and warm water.
Avoid harsh chemicals or abrasive cleaners that could damage the plastic.
Step 4: Rinse Thoroughly
Soap residue can affect taste and potentially irritate sensitive mouths.
Rinse until the water runs completely clear.
Step 5: Air Dry Completely
Allow the reservoir to dry upside down on a clean towel.
Never store it while wet.
The Best Way to Remove Mineral Deposits
Hard water is often the hidden villain behind poor water flosser performance.
Over time, calcium and magnesium deposits accumulate inside the device.
Signs of Mineral Buildup
- Reduced pressure
- Irregular water flow
- White residue
- Strange noises during operation
Using White Vinegar
White vinegar acts like a gentle superhero against mineral deposits.
Mix:
- 1 part white vinegar
- 1 part warm water
Fill the reservoir halfway with the solution.
Run the device until about half the mixture passes through the system.
Turn the unit off and let it sit for 20 to 30 minutes.
This soaking period allows the vinegar to dissolve mineral buildup inside the internal channels.
Flushing the Internal Components
Internal cleaning is often overlooked.
Yet it’s one of the most important maintenance tasks.
Complete the Vinegar Cycle
After soaking, run the remaining solution through the device.
This flushes loosened deposits from the system.
Refill with Clean Water
Fill the reservoir with fresh water.
Run a full reservoir through the unit.
Repeat if a vinegar smell remains.
The goal is to leave the device fresh and residue-free.
How to Clean Waterpik Tips Properly
The tip is where water meets your mouth.
Keeping it clean is essential.
Daily Rinse
After each use:
- Remove the tip
- Rinse under warm water
- Shake off excess moisture
Weekly Sanitizing
Soak the tip for five minutes in:
- Two parts water
- One part white vinegar
Alternatively, some users prefer a mild antibacterial mouthwash solution.
Inspect for Damage
Replace tips showing:
- Cracks
- Warping
- Discoloration
- Reduced performance
How Often Should You Replace Waterpik Tips?
Even perfectly cleaned tips wear out.
Most manufacturers recommend replacement every three to six months.
Why Replacement Matters
Old tips may:
- Lose effectiveness
- Harbor bacteria
- Deliver weaker pressure
- Become damaged internally
Think of tips like toothbrush heads—they perform best when replaced regularly.
Cleaning the Exterior of the Device
A spotless reservoir means little if the outside remains dirty.
Wipe Down the Handle
Use a damp cloth with mild soap.
Focus on:
- Buttons
- Grip areas
- Reservoir connection points
Avoid Excess Moisture
Never immerse the main handle in water.
The internal electronics aren’t designed for full submersion.
Dry Thoroughly
Use a clean towel after wiping.
Moisture trapped around buttons can eventually create problems.
Preventing Mold and Mildew Growth
Mold thrives in dark, damp environments.
Unfortunately, a neglected water flosser provides both.
Simple Prevention Tips
Always Empty the Tank
Never store water between uses.
Leave the Reservoir Open
Allow air circulation whenever possible.
Store in a Dry Area
Avoid humid cabinets and enclosed spaces.
Clean Regularly
Routine maintenance is the best defense against mold.
Can You Use Mouthwash in a Cordless Waterpik?
Many users wonder whether mouthwash can replace water.
The answer is generally yes, but with caution.
Benefits
- Fresher breath
- Added antibacterial action
- Pleasant taste
Important Rule
Always rinse the reservoir thoroughly afterward.
Leaving mouthwash inside the unit can lead to residue buildup and reduced performance.
Common Cleaning Mistakes to Avoid
Even well-intentioned maintenance can cause issues.
Using Bleach
Bleach may damage components and leave harmful residue.
Ignoring Hard Water Deposits
Mineral buildup doesn’t disappear on its own.
Submerging the Entire Unit
Water and electronics are rarely good friends.
Skipping Regular Maintenance
Waiting until problems appear usually means more work later.
Troubleshooting a Dirty Water Flosser
Sometimes cleaning becomes necessary because performance has already declined.
Weak Water Pressure
Likely causes:
- Mineral buildup
- Clogged tip
- Dirty internal channels
Unpleasant Odor
Usually indicates:
- Stagnant water
- Bacterial growth
- Inadequate drying
Uneven Water Stream
Potential reasons:
- Obstructed tip
- Internal deposits
- Worn components
A thorough vinegar cleaning cycle often resolves these issues.
Long-Term Maintenance Tips
Good maintenance isn’t complicated.
It’s simply about building small habits.
Create a Cleaning Schedule
Set reminders for:
- Weekly cleaning
- Monthly descaling
- Tip replacement
Use Filtered Water
Filtered water contains fewer minerals and reduces buildup.
Inspect Components Regularly
Catch small issues before they become expensive problems.
Store Correctly
A clean, dry environment helps maximize longevity.
When It’s Time to Replace Your Cordless Waterpik
Even the best-maintained devices eventually wear out.
Signs Replacement May Be Necessary
Persistent Leaks
Leaks that continue after cleaning often indicate internal wear.
Battery Problems
Cordless units rely heavily on battery health.
Motor Weakness
Consistently reduced pressure may signal motor deterioration.
Recurring Internal Buildup
Older devices sometimes become increasingly difficult to clean effectively.
Creating a Simple Cleaning Routine
Let’s simplify everything into a practical routine.
Daily
- Empty reservoir
- Rinse tank
- Dry components
Weekly
- Wash reservoir with soap
- Sanitize tip
- Wipe exterior
Monthly
- Run vinegar cleaning cycle
- Flush with fresh water
- Inspect for wear
Following this schedule takes very little time but dramatically improves hygiene and performance.
Final Thoughts
Cleaning a cordless Waterpik water flosser isn’t complicated, but it is essential. Like any tool that handles water daily, it performs best when cared for consistently. By rinsing the reservoir after every use, sanitizing tips regularly, removing mineral deposits with vinegar, and allowing components to dry completely, we can keep our water flosser operating like new.
Think of maintenance as an investment rather than a chore. A few minutes today can prevent poor performance, unpleasant odors, and costly replacement tomorrow. When we keep the device clean, every flossing session feels fresh, effective, and worthy of the healthy smile we’re working so hard to maintain.
Frequently Asked Questions
FAQ 1: Can I clean my cordless Waterpik with vinegar?
Yes. A 1:1 mixture of white vinegar and warm water is one of the safest and most effective ways to remove mineral deposits and sanitize internal components.
FAQ 2: How often should I deep clean my cordless Waterpik?
A thorough cleaning once per month is typically sufficient, although users with hard water may benefit from more frequent cleaning.
FAQ 3: Can mold grow inside a Waterpik water flosser?
Yes. Leaving water in the reservoir or storing the unit while wet can encourage mold and mildew growth.
FAQ 4: Should I use distilled water in my Waterpik?
Distilled or filtered water can reduce mineral buildup and help prolong the life of the device.
FAQ 5: How long do Waterpik tips last?
Most tips should be replaced every three to six months, depending on usage and manufacturer recommendations.