
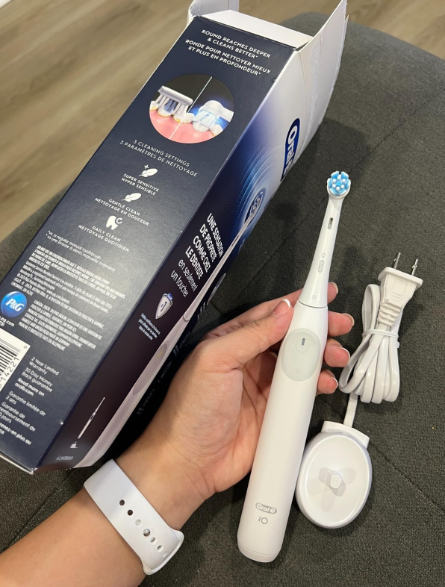
When an Oral-B iO Series 2 won’t turn on, it can feel strangely dramatic for such a small device. One day it hums along like a tiny dental engine, and the next day… silence. No vibration. No light. No sign of life. We press the power button again, maybe a little harder, maybe with the kind of hope usually reserved for stubborn TV remotes. Still nothing.
The good news? A dead-looking toothbrush is not always a dead toothbrush.
In many cases, the issue comes down to charging, moisture, a locked-up button, a tired battery, a faulty charger, or a simple user error that is easy to miss. Oral-B’s own support guidance points users toward checking the battery, charger, outlet, and product type when a toothbrush will not power on. Oral-B also notes that some rechargeable toothbrushes may take several minutes before the charging light begins flashing after being placed on the charger.
So before we assume the worst, let’s walk through the most practical fixes. We’ll keep things simple, honest, and useful.
Why Your Oral-B iO Series 2 Won’t Turn On
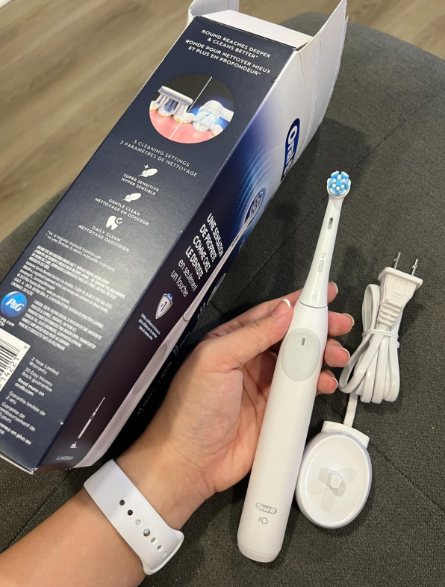
The Oral-B iO Series 2 is a rechargeable electric toothbrush, which means the problem usually sits in one of four places: the handle, the battery, the charger, or the power source. Think of it like a chain. If one link fails, the whole brush seems dead.
The most common causes include:
- A fully drained battery
- A charger that is not receiving power
- Poor contact between the brush and charging base
- Moisture or residue around the handle or charger
- A power button that is stuck or not responding
- Charging outside normal conditions
- Internal battery degradation
- A damaged charging base
- A faulty handle
Oral-B recommends using the product type number to find the correct manual if you are unsure which exact model you own. The type number is usually found on the bottom of the toothbrush handle, and Oral-B’s manual finder allows users to search by that number.
Before We Start: Do Not Panic-Charge It for 30 Seconds
One of the biggest mistakes we make is placing the toothbrush on the charger for a minute, seeing no instant light, and declaring it dead.
That is like plugging in a phone with a completely flat battery and expecting it to wake up instantly. Sometimes deeply discharged devices need time before they show any signs of charging. Oral-B states that with some toothbrushes, the charging light may take up to 10 minutes to start flashing after being plugged in.
So if your Oral-B iO Series 2 won’t turn on, patience is part of the troubleshooting process.
First Check: Is the Oral-B iO Series 2 Actually Charged?
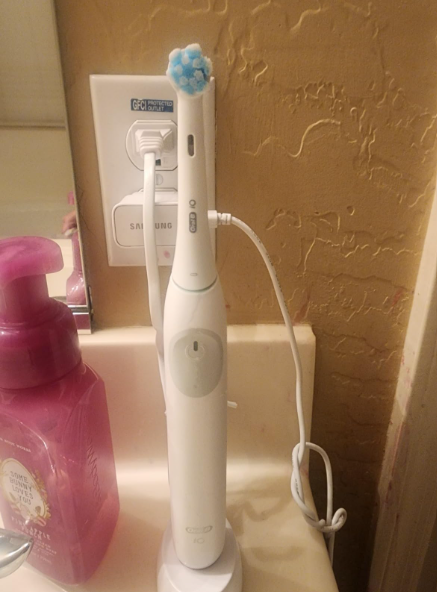
Let’s begin with the obvious-but-often-overlooked question: has the toothbrush really charged?
Place the handle correctly on the charging base. Make sure it sits upright and stable. Then leave it there for at least 30 minutes before testing it again. If the battery was deeply drained, a short charge may not be enough.
For a better test, leave it charging for several hours. Oral-B’s support content explains that most Oral-B handles include a charging indicator to show battery status or whether charging is needed.
Signs the Battery May Be Completely Flat
Your iO Series 2 may simply have no usable battery left if:
- It has not been charged for weeks or months
- It stopped mid-brush and never restarted
- The light flashed red before dying
- It gives no vibration at all
- It only turns on briefly, then shuts off
- It works only after sitting on the charger for a long time
A flat battery is not necessarily damaged. But if it has been left empty for a long period, it may need a longer charging session before it wakes up.
Check the Power Outlet Before Blaming the Toothbrush
This sounds too basic, but it matters. The charger can only work if the outlet works.
Oral-B advises checking that the power outlet is functioning properly, especially if the socket is connected to a bathroom cabinet or controlled by a light switch.
Try this:
- Plug another device into the same outlet.
- Use a different outlet in another room.
- Avoid extension cords during testing.
- Make sure the charger plug is fully inserted.
- Check whether the bathroom socket only works when a wall switch is on.
A bathroom outlet can be sneaky. Sometimes it looks alive but is switched off somewhere else.
The Bathroom Cabinet Trap
Some bathroom cabinets have built-in sockets that only receive power when the cabinet light is switched on. If your toothbrush charger is plugged into one of these, the brush may sit there looking fancy while receiving absolutely no power.
That means the toothbrush is not broken. It is just waiting for electricity that never arrived.
Inspect the Oral-B iO Series 2 Charger
If the outlet works, the next suspect is the charger.
Look closely at the charging base. Is the cable damaged? Is the plug loose? Is the base cracked? Does the toothbrush sit properly on it?
The Oral-B iO line uses a charging system where correct placement matters. If the handle is not seated properly, it may not charge as expected. Oral-B’s iO2 start guide tells users to place and power on the brush correctly before brushing, reinforcing that handle positioning and normal use steps matter.
How to Test the Charger
Try this simple charger check:
- Unplug the charger.
- Inspect the cable from top to bottom.
- Look for bends, cuts, exposed wire, or heat marks.
- Plug it into a known working outlet.
- Place the toothbrush upright on the base.
- Wait several minutes for a charging response.
If you have another compatible Oral-B charger, test the brush with it. If the brush charges on another base, your original charger is likely the problem.
Clean the Handle and Charging Base
A toothbrush lives in one of the messiest environments in the house: the bathroom sink. Toothpaste foam, water, mineral deposits, mouthwash spray, and dust can all gather around the base of the handle and charger.
Even when everything looks clean from a distance, a thin layer of residue can interfere with charging.
Oral-B’s FAQ guidance mentions keeping the charging process free from interference and checking charging conditions, including avoiding charging on metal surfaces because metal may interfere with charging.
How to Clean It Safely
Use this careful cleaning method:
- Unplug the charger.
- Remove the brush head from the handle.
- Wipe the bottom of the toothbrush handle with a soft damp cloth.
- Clean the charging base with a dry or slightly damp cloth.
- Remove toothpaste buildup around the bottom edge.
- Dry both pieces completely.
- Wait a few minutes before plugging the charger back in.
Do not soak the charger. Do not rinse the charger under running water. The brush handle is designed for bathroom use, but the charger should be treated more carefully.
The Toothpaste Cement Problem
Old toothpaste can harden like tiny bathroom concrete. If it builds up around the bottom of the handle, the toothbrush may not sit correctly on the charger.
That tiny gap can be enough to stop charging.
So yes, cleaning the base may feel too simple. But sometimes the simple fix is the one that saves us from buying a new toothbrush.
Make Sure the Brush Head Is Not Jammed
Sometimes the handle itself is not the problem. The brush head may be stuck, clogged, or pressing down in a way that affects normal movement.
Remove the brush head and try turning on the handle without it.
If the handle turns on without the brush head, the issue may be:
- Dried toothpaste inside the brush head
- A damaged replacement head
- A brush head pushed too far down
- Debris around the metal drive shaft
- A third-party head that does not fit well
Clean Around the Metal Shaft
The small metal shaft at the top of the handle moves the brush head. If toothpaste dries around it, the motion can feel restricted.
Wipe around the shaft gently. Do not pull it hard. Do not twist it with tools. We are cleaning, not performing surgery.
Once it is clean and dry, try powering the handle again.
Try a Long Press on the Power Button
If the Oral-B iO Series 2 won’t turn on, the power button may be stuck or temporarily unresponsive.
Press and hold the button for 10 to 15 seconds. Then release it. Wait a few seconds. Press it normally again.
Some third-party troubleshooting videos suggest a long button press as a soft reset-style step for iO power issues, though official support should remain the final reference for warranty and service decisions.
What This Can Fix
A long press may help if:
- The toothbrush froze electronically
- The button did not register a normal press
- The handle is stuck in a non-responsive state
- The battery has a small amount of power but the brush will not start
It is not magic, but it is quick, safe, and worth trying.
Check Whether the Power Button Is Physically Stuck
A stuck button can make the toothbrush act dead. Toothpaste residue can dry around the button edge, making it hard for the button to click properly.
Press the button slowly. Does it feel normal? Does it click? Does it feel mushy, jammed, or uneven?
How to Free a Sticky Button
Try this:
- Wipe around the button with a damp cloth.
- Use a soft toothbrush or cotton swab around the button edge.
- Avoid sharp tools.
- Do not pour water directly into the button.
- Dry the handle fully.
- Try pressing the button again.
If the button remains stuck, the handle may need service.
Look for Any Light Response
Even if the brush will not turn on, watch for lights.
A small light response can tell us the handle is still alive. No light at all after hours of charging suggests a deeper issue.
Look for:
- Flashing battery light
- Red low-battery warning
- White or green charging signal
- Pressure sensor light
- Any brief flash when pressing the button
Oral-B support has separate guidance for iO Series 2–6 models when the LED display or light is not working, which is useful if the brush operates but the indicator does not behave normally.
No Light and No Vibration
If there is no light, no vibration, and no response after charging, the likely causes are:
- Dead charger
- Dead outlet
- Deeply discharged battery
- Failed internal battery
- Internal circuit problem
- Water damage
- Faulty handle
This is where we move from easy fixes to diagnosis.
Charge It Away From Metal Surfaces
This is one of those details people often miss. Oral-B warns that charging on a metal surface can interfere with the charging process.
If your charger sits on a metal shelf, metal sink surround, or metal bathroom cabinet, move it.
Place the charger on:
- A wooden shelf
- A plastic tray
- A ceramic counter
- A dry non-metal surface
Then charge the toothbrush again.
Why This Matters
Charging systems can be sensitive to positioning and interference. We do not need to turn our bathroom into a laboratory, but moving the charger to a clean, dry, non-metal surface is a smart test.
It costs nothing and can rule out one more possible cause.
Let the Toothbrush Dry Completely
Moisture is normal in a bathroom. But constant moisture around the handle, button, or charger can cause problems.
If your toothbrush was recently rinsed heavily, dropped in water, stored wet, or left on a wet charger base, give it time to dry.
Drying Method
Do this:
- Remove the brush head.
- Wipe the handle thoroughly.
- Wipe the charger.
- Leave both parts unplugged.
- Let them air-dry in a ventilated place.
- Wait several hours before testing again.
Do not use a hair dryer on high heat. Do not place it near a heater. Heat can damage seals and internal parts.
Check for Travel Lock or Mode Confusion
Some electric toothbrushes include travel lock features, but the iO Series 2 is a simpler model compared with higher iO versions. Still, users may confuse a non-starting handle with a mode or button issue.
Try pressing the button normally once. Then press and hold. Then place it on the charger and try again.
If the handle vibrates briefly or lights up but does not continue brushing, the issue may not be “won’t turn on” exactly. It may be low battery, button response, or internal protection.
Was the Toothbrush Stored for a Long Time?
Rechargeable batteries do not love being ignored.
If the Oral-B iO Series 2 sat unused in a drawer for months, the battery may have dropped into a deeply discharged state. In that case, it may need a longer charge before showing life.
Oral-B advises maintaining rechargeable battery capacity by occasionally fully discharging and recharging some handles, depending on the model guidance.
Storage-Related Symptoms
A stored toothbrush may show:
- No immediate charging light
- Weak vibration after long charging
- Very short battery life
- Failure to hold charge
- Delayed response after being placed on the charger
Try a full charging cycle before deciding it is dead.
New Oral-B iO Series 2 Won’t Turn On Out of the Box
If your brand-new Oral-B iO Series 2 will not turn on, do not assume it is defective immediately. Many rechargeable products ship with partial charge, but some arrive deeply drained.
Do this first:
- Charge it for several hours.
- Confirm the outlet works.
- Make sure the handle is seated correctly.
- Check the charger and plug.
- Try a long press on the power button.
- Remove the brush head and test the handle alone.
If it still does nothing after a proper charging attempt, it may be a defective unit.
When to Return a New Unit
Consider returning or exchanging it if:
- It has never turned on
- It shows no charging light
- It does not respond after several hours on a working charger
- The charger works with another compatible brush
- The packaging or handle appears damaged
A new product should not require heroic troubleshooting.
Oral-B iO Series 2 Turns On Then Immediately Stops
This is slightly different from not turning on at all.
If your toothbrush starts for one second and then shuts off, the battery may be too low to run the motor. Charge it fully and test again.
Other possible causes include:
- Battery can no longer deliver enough power
- Brush head is jammed
- Internal motor issue
- Moisture inside the handle
- Faulty power button
Try removing the brush head and turning on only the handle. If it runs normally, the brush head or shaft area may be the issue.
Oral-B iO Series 2 Only Works on the Charger
If the brush only responds while sitting on the charger, the battery may no longer hold a usable charge.
This often means:
- The charger is delivering power
- The handle can detect charging
- The battery may be weak or failing
- The internal battery connection may be faulty
Rechargeable toothbrush batteries eventually wear down. If the brush is old, used daily, and now dies immediately off the charger, replacement may be more realistic than repair.
Could It Be the Battery?
Yes, it could.
Rechargeable batteries have a lifespan. Over time, they lose capacity. At first, the brush may last fewer days between charges. Later, it may need constant charging. Eventually, it may not turn on at all.
Battery Failure Signs
The battery may be failing if:
- The brush charges but dies quickly
- It will not hold charge overnight
- It turns on only for a few seconds
- It gets weaker over time
- It is several years old
- It shows charging lights but never runs properly
Oral-B’s troubleshooting pages for battery and charging problems direct users to check battery and charger-related causes when a toothbrush will not power on.
Could It Be the Charger Instead?
Also yes.
A bad charger can make a healthy toothbrush look dead. That is why testing with another outlet and another compatible charger is so helpful.
Charger Failure Signs
Your charger may be the problem if:
- The toothbrush worked normally before the battery drained
- No charging light appears
- The charger cable is damaged
- The base feels unusually hot
- Another compatible handle also fails to charge
- The brush works on a different charger
If the charger is faulty, replacing only the charger may be cheaper than replacing the whole toothbrush.
Could It Be Water Damage?
Electric toothbrushes are designed for wet environments, but they are not invincible submarines.
Water can still become a problem if:
- The handle was submerged
- The charger got wet
- The brush was stored in standing water
- The handle seal is damaged
- The button area has cracks
- The toothbrush was dropped
Water Damage Clues
Look for:
- Rust-colored marks
- Strange smell
- Flickering lights
- Random vibration
- Charger heat
- No response after drying
- Corrosion around the base or shaft
If you suspect water damage, stop charging it until it is fully dry. Charging wet electronics can make things worse.
What Not to Do When Your Oral-B iO Series 2 Won’t Turn On
When frustration kicks in, we sometimes become amateur engineers. That is when small problems become permanent problems.
Avoid these mistakes:
- Do not force the power button with a sharp object.
- Do not open the handle unless you accept the risk of damaging it.
- Do not soak the charger in water.
- Do not use a damaged charger.
- Do not charge it on a wet surface.
- Do not use random incompatible chargers.
- Do not keep using it if it smells burnt.
- Do not ignore overheating.
Oral-B support includes specific categories for serious issues such as burning smells from the toothbrush or charger, which should be treated more cautiously than ordinary charging problems.
Step-by-Step Fix Checklist
Here is the practical order we would follow if the Oral-B iO Series 2 were sitting dead on our bathroom counter.
Step 1: Test the Outlet
Plug in another device. Make sure the socket works.
Step 2: Move the Charger
Place it on a dry, non-metal surface.
Step 3: Clean the Base and Handle
Remove residue, toothpaste buildup, and moisture.
Step 4: Seat the Handle Correctly
Make sure the toothbrush sits properly on the charging base.
Step 5: Wait for a Charging Light
Give it at least 10 minutes before expecting a light response.
Step 6: Charge for Several Hours
A deeply drained battery needs time.
Step 7: Remove the Brush Head
Try turning on the handle alone.
Step 8: Long-Press the Power Button
Hold the power button for 10 to 15 seconds, release, then try again.
Step 9: Try Another Charger
Use a compatible charger if available.
Step 10: Contact Oral-B or Replace It
If nothing works, the battery, motor, or internal electronics may have failed.
How Long Should the Oral-B iO Series 2 Take to Wake Up?
There is no single perfect answer because battery condition matters. But for troubleshooting, we can use a sensible timeline.
After 10 Minutes
You may begin to see a charging indicator, especially if the battery was not completely empty. Oral-B says some toothbrushes can take up to 10 minutes before the charging light starts flashing.
After 30 Minutes
The brush may have enough power to turn on briefly.
After Several Hours
It should normally show signs of charging or operation unless the charger, battery, or handle has a fault.
After Overnight Charging
If there is still no light, no vibration, and no response, we are likely looking at a real hardware issue.
When the Light Works but the Motor Does Not
Sometimes the handle lights up but will not vibrate. That tells us the toothbrush is not completely dead. Power is reaching part of the system, but the motor may not be engaging.
Possible causes:
- Motor failure
- Jammed drive shaft
- Internal electronics problem
- Brush head obstruction
- Battery too weak to run the motor
Remove the brush head and test again. If the shaft does not move at all, the motor or internal drive system may need service.
When the Motor Works but the Light Does Not
This is the opposite situation. The toothbrush may brush normally, but the LED or display light does not work.
Oral-B has specific support guidance for iO Series 2–6 LED display issues. If the toothbrush runs normally, your main problem may be the indicator system, not the motor or battery.
That matters because a brush with a failed light may still be usable, while a brush with a failed motor is not.
Warranty: When to Stop Troubleshooting
There comes a point where troubleshooting stops being helpful and starts becoming a waste of time.
If your Oral-B iO Series 2 is still under warranty and it will not respond after basic checks, contact Oral-B support or the retailer. Oral-B’s support site provides a manual finder and troubleshooting categories for battery, charging, and power issues.
Contact Support If:
- The toothbrush is new and never turned on
- It stopped working suddenly
- It will not charge on a working outlet
- The charger appears damaged
- The handle smells burnt
- It overheats
- It shows no response after overnight charging
- It is still under warranty
Do not open the handle if you plan to claim warranty support. Opening it may affect eligibility.
Should You Repair or Replace It?
This depends on age, warranty, cost, and symptoms.
Replace the Charger If:
- The toothbrush works on another charger
- The charger cable is visibly damaged
- The base does not charge any compatible handle
- The handle itself seems fine
Replace the Toothbrush If:
- The battery no longer holds charge
- The handle is out of warranty
- It has water damage
- It does not respond to any charger
- Repair costs are close to replacement cost
- The motor has failed
For many electric toothbrushes, replacing the handle is often more practical than repairing internal parts, especially once the battery or motor fails.
How to Prevent the Problem From Happening Again
Once your Oral-B iO Series 2 is working again, a few habits can help prevent future power issues.
Keep the Charger Dry
Wipe the charger regularly and avoid letting water pool around it.
Clean the Handle Base Weekly
A quick wipe can prevent toothpaste buildup from blocking proper charging.
Do Not Store It Dead for Months
Rechargeable batteries prefer occasional use and charging.
Use the Correct Charger
Stick with the charger designed for your model or an officially compatible replacement.
Avoid Metal Charging Surfaces
Oral-B notes that metal surfaces can interfere with charging.
Let It Breathe
Do not trap the wet handle in a closed case every day. Let it dry.
Common User Mistakes That Make the iO Series 2 Seem Dead
Sometimes the toothbrush is not broken. It is just being misunderstood.
Mistake 1: Not Charging Long Enough
A deeply flat battery may need more than a few minutes.
Mistake 2: Using a Dead Bathroom Socket
Bathroom outlets can be controlled by switches.
Mistake 3: Charging on Metal
Metal can interfere with charging.
Mistake 4: Leaving Toothpaste Around the Base
Residue can stop the handle from sitting correctly.
Mistake 5: Assuming No Immediate Light Means Failure
Some models may take several minutes before showing a charging light.
Our Practical Diagnosis Table
| Symptom | Likely Cause | Best First Fix |
|---|---|---|
| No light, no vibration | Dead battery, charger, or outlet | Test outlet and charge several hours |
| Light flashes but brush will not start | Low battery or internal issue | Charge longer and remove brush head |
| Turns on then stops | Weak battery or jammed head | Charge fully and test without head |
| Works only on charger | Battery not holding charge | Consider warranty or replacement |
| Charger gets hot | Charger fault | Stop using and contact support |
| Button feels stuck | Toothpaste or debris | Clean around button carefully |
| New brush won’t start | Deep discharge or defective unit | Charge fully, then exchange if needed |
| Brush works but light does not | LED/display issue | Check Oral-B iO 2–6 LED support |
Final Verdict: Is Your Oral-B iO Series 2 Dead?
Not necessarily.
When an Oral-B iO Series 2 won’t turn on, we should not jump straight to replacement. The smartest path is simple: check the outlet, clean the handle and charger, charge it on a dry non-metal surface, wait long enough for a deeply drained battery, test the handle without the brush head, and try a long press on the power button.
If the brush shows any light, sound, or vibration, there is still something to work with. If it stays completely silent after a full charging attempt on a working outlet with a clean charger, then the problem is more likely internal.
At that point, warranty support or replacement becomes the realistic move.
A toothbrush should make mornings easier, not turn into a detective story. But with the right steps, we can usually tell whether the iO Series 2 needs a simple reset, a proper charge, a clean base, a new charger, or a goodbye.
FAQs About Oral-B iO Series 2 Won’t Turn On
Why won’t my Oral-B iO Series 2 turn on even after charging?
It may not be charging properly. Check the outlet, charger, handle placement, and charging surface. Clean the base and leave it charging for several hours. If there is still no light or vibration, the battery or internal electronics may have failed.
How long should I charge my Oral-B iO Series 2 before testing it?
If the battery is deeply drained, give it at least 30 minutes before testing, and several hours for a stronger result. Oral-B notes that some toothbrushes may take up to 10 minutes before the charging light begins flashing.
Can toothpaste buildup stop my Oral-B iO Series 2 from charging?
Yes. Dried toothpaste around the bottom of the handle or charging base can prevent proper seating. Clean both parts carefully, dry them, and try charging again.
What should I do if my Oral-B iO Series 2 only works for a few seconds?
Charge it fully, remove the brush head, and test the handle alone. If it still shuts off quickly, the battery may be weak or failing.
Should I replace my Oral-B iO Series 2 if it will not turn on?
Replace it only after checking the outlet, charger, cleaning, charging time, brush head, and button. If it remains completely unresponsive after overnight charging and basic troubleshooting, contact Oral-B support or consider replacing the handle.